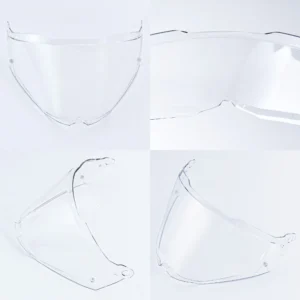
You tilt the peak down a touch and the visor won’t quite reach its top stop. Or you hit motorway speed and the helmet buffets and tries to lift. Both feel like helmet faults, so the instinct is to order a new part. More often, the likely culprits are simpler: a peak set at the wrong angle, or fixings that aren’t tightened evenly.
That’s why this guide works in a different order. Start by choosing the setup that fits your mix of road, gravel and trail. Then use your symptoms (lift, whistle, scratching, a loose peak) to work out what to adjust before you spend anything. Swapping a visor comes last. Throughout, treat your manufacturer’s manual as the final word on your helmet.
Pick Your Configuration by Riding Mix
Start with where you actually spend your hours, because each setup suits a different mix.
Mixed road and gravel: Peak on with a clear visor is the sensible default. The main job is setting the peak high enough to avoid buffeting at motorway speeds, so treat that angle as part of the choice rather than an afterthought.
Slow technical trail and hot weather: Peak on, visor off, goggles. You gain airflow and a clear view when you’re moving slowly, but the visor still has to travel with you for the road sections. Don’t leave it loose in a pannier or bag where it can rub against tools or grit. Wrap it in something soft and keep it somewhere it won’t be crushed, because a scratched visor is the usual price of careless carrying.
Long road days at sustained speed: Peak off, visor fitted. Without the peak there’s nothing to catch the wind or rub the visor. Keep the peak screws together in a labelled bag so they don’t go missing.
Moving between shade and open sun: Peak on with a photochromic visor. It darkens in bright sun and turns near-clear again as the light drops, which saves swapping lenses as conditions change.
If your riding spans all of these, pick the setup you’ll use most and adjust from there.
Reading Symptoms: Lift, Whistle, Scratches, Loose Peak
Most front-end complaints trace back to a short list of likely causes, so match what you notice to the cause before buying anything.
Helmet lifts or pulls at speed. The peak is probably set too steep and catching the wind. Lower it a step, or remove it for long, fast stretches.
Visor won’t reach its top stop, or its top edge is scratched. The visor is likely touching the underside of the peak. Raise the peak until the visor travels freely, then reset the gap. Fine scratches along the top edge usually mean the peak has been rubbing as the visor opens, and a scratched visor needs replacing rather than polishing.
Whistle or draught across the eyes. Suspect a visor that isn’t seated evenly on its pivots. Remove and refit the side that sits proud.
Peak works loose on rough ground. Uneven tightening is the most likely culprit. Snug both sides a little at a time rather than finishing one side first, then recheck after your next ride. If a peak keeps working loose, check ls2 pioneer 2 peak replacement compatibility before blaming the fixings.
As general guidance only, and not a tested specification, dual-sport riding on corrugated tracks puts more shake through the shell than tarmac does, so fixings that were marginal on the road may show it off-road. For a ls2 pioneer 2 dual sport peak vibration fix, start with peak angle and even fixing tension, and follow the manufacturer’s manual for your helmet.
Swapping the Visor Without Drama
A visor swap goes smoothly when you treat it as a short sequence rather than a fight with the catches. Start by protecting the visor: put the helmet on a folded towel on a table, because a visor dropped edge-first is easily marked. Tilt the peak to its highest setting so you can see the pivots and have room to lift the visor clear. Then raise the visor to its top stop, where release mechanisms are usually designed to line up.
Release one side and draw that end away on a gentle arc, keeping a hand on the visor so it doesn’t swing and load the other pivot. Release the second side and lift the visor out from under the peak. Working both sides evenly, rather than forcing one, helps protect the mechanism.
Before fitting anything, wipe both pivot areas with a damp cloth. Trail dust collects there and can scratch the new visor or stop the catch closing. Offer the new visor to the first pivot at its open angle, seat it flush and let the catch return, then seat the second side. Lower the peak to your chosen angle and recheck the gap, so the visor reaches its top stop without touching.
If you want pivot-by-pivot detail, a full walkthrough of how to swap ls2 pioneer 2 visor with peak is worth keeping open. Above all, confirm your exact helmet model and variant, MX702 included, before ordering. Don’t assume a visor or peak fits; check against your manual or the seller’s stated compatibility.
Choosing the Right Replacement Visor
Settle your setup first, then choose the visor to match it. A clear visor suits mixed road and gravel riding with the peak on, and it’s the safest default if your rides stretch into early mornings, evenings or shaded lanes. If the top edge is scratched, the peak has most likely been rubbing it, so that’s a job for an ls2 pioneer 2 clear shield replacement, not polishing. Recheck the peak gap when you refit, or the new one may pick up the same marks.
A photochromic visor suits riders who move between shade and open sun. It darkens in bright light and turns near-clear as the light drops. If your trail days are slow and hot, goggles with the visor stowed may suit you better.
Fogging is a separate question. If it bothers you, confirm whether an ls2 pioneer 2 visor pinlock ready option suits your helmet. Don’t assume it does. Check the manual or the seller’s listing against your exact model and variant.
Tints need the same caution. Riders who buy ls2 pioneer ii tint visor options should first check road-legality rules for their region, since a tint that’s fine off-road may not be acceptable on public roads.
Conclusion
Choose the setup for your riding mix first, then let the parts follow. Before you ride, check that:
- the visor reaches its top stop without touching the peak
- both sides sit flush, with no proud edge
- the pivots are clean
- both peak fixings are snug and even
After the first ride, recheck the peak gap and fixing tension, and listen for whistling or any lift at speed. Fix whatever shows up one step at a time, and follow the manufacturer’s manual where it differs from general guidance.